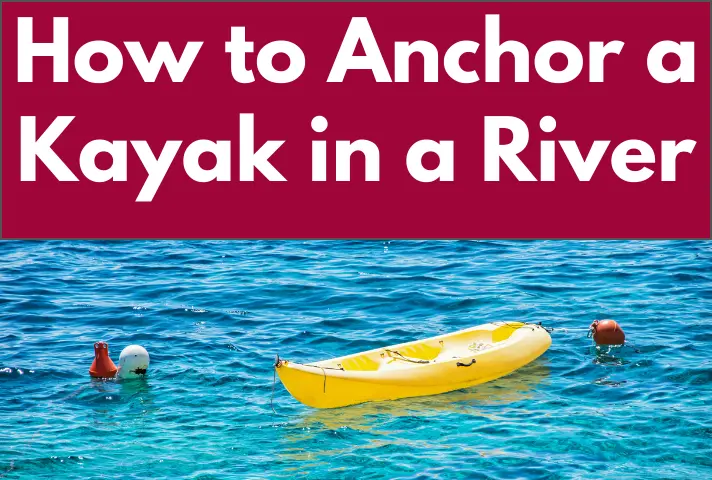
Anchoring a kayak in the dynamic environment of a river requires the right technique and gear. This guide provides straightforward instructions on how to anchor a kayak in a river, including choosing an anchor, securing it in a flowing river, and adjusting for stability. By the end of this article, you’ll have the knowledge to confidently anchor in currents, keeping you focused on fishing or soaking in the scenery – not drifting away.
- Key Takeaways
- Selecting the Right Kayak Anchor for River Currents
- Crafting Your River Anchoring Kit
- Step-by-Step Guide: How to Anchor a Kayak in a River
- Adapting to River Conditions
- Enhancing Your Fishing Experience While Anchored
- Navigating Anchoring Regulations and Best Practices
- What can I use as a kayak anchor?
- How heavy of an anchor do I need for a kayak?
- Where is the best place to anchor a kayak?
- Frequently Asked Questions
- Conclusion
Key Takeaways
- Choose the right kayak anchor suited to river conditions; a folding grapnel works well on rocky beds, while a drag chain is suited for slower currents and muddy bottoms.
- Your anchoring kit is crucial and should include a durable anchor rope, a reliable kayak anchor trolley, safety gear like a knife, and waterproof lights.
- The practical anchoring technique involves finding a stable spot, securing the anchor with enough rope (rule of three for current), and adjusting your position with an anchor trolley.
Selecting the Right Kayak Anchor for River Currents
The journey to master kayak anchoring begins with choosing an appropriate anchor for river currents, much like selecting the right tool for a specific job. You wouldn’t use a hammer to screw in a bolt, would you? Similarly, the right anchor for calm lake fishing may not be suitable for a river with strong currents.
Don’t worry, we’ll guide you through this. Two primary types of anchors, the folding grapnel anchor, and the drag chain, are designed to address the diverse and challenging river conditions. Each has its unique qualities, and their effectiveness depends largely on the riverbed’s nature and the current’s strength.
Before exploring further, let’s clarify the types of these folding anchors. The folding grapnel anchor, as its name suggests, has a clever design with four flukes that fold out to grip rocky or uneven riverbeds. On the other hand, a drag chain anchor is a simpler design that’s less likely to get snagged and provides a gentle hold, making it suitable for slow-moving rivers or areas with muddy bottoms.
The Versatile Folding Grapnel Anchor
The folding grapnel anchor is a popular choice among kayak anglers, and for good reason. It is designed to tackle the problem of anchoring on a rocky river bed. Here’s why it’s a great choice:
- It has multiple prongs that can grip onto rocks and provide a secure hold.
- It is foldable, making it easy to store and transport.
- It is lightweight, so it won’t weigh down your kayak.
- It is durable and can withstand the elements.
Next time you’re kayaking on a river with a rocky bed, consider using a folding grapnel anchor for a secure and hassle-free anchoring experience.
This anchor works like a grappling hook (hence the name ‘grapnel’). It features four flukes that open out when deployed. These flukes can grip onto rocky and uneven surfaces, providing a secure hold. For most kayaks, a 1.5kg folding grapnel anchor is recommended. It’s the perfect balance between holding power and manageable weight.
That’s not all, though. Attaching a 3-4 foot chain where the rope connects to the anchor can boost the anchor’s grip. This helps the anchor stay in a horizontal dragging position, which is crucial for the flukes to dig into the riverbeds and set the anchor securely. So, the next time you come across a rocky riverbed, you know which anchor to deploy.
Drag Chain: A Subtle Approach
In certain scenarios, the complexity of a folding grapnel anchor isn’t necessary. Instead, one might opt for the understated effectiveness of a drag chain anchor. This is essentially a heavy chain that trails across the bed of the river and provides modest resistance. It’s particularly well-suited to environments like slow-flowing rivers or those with soft, muddy beds.
The design specs for an average drag chain anchor would typically include about 4 feet in length and have an approximate weight nearing 10 pounds—although these dimensions can be adjusted according to local conditions. The charm of this system resides in its uncomplicated nature: it has reduced tendencies to become entangled when compared to conventional anchors, which makes it especially reliable on gentler riverbeds where traditional grappling anchors may falter.
Crafting Your River Anchoring Kit
When you have picked out the right anchor, preparing your river anchoring setup is next in line. Imagine outfitting yourself like a superhero gearing up for action. Just as Batman never leaves his cave without his utility belt, venturing into kayak fishing should always involve having your anchoring kit ready.
This essential kit comprises three critical elements: a robust anchor rope, a steadfast kayak anchor trolley system, and indispensable safety equipment. All these items are fundamental to guarantee both security and effectiveness while anchoring during your fishing adventures on a kayak. We’ll dig deeper into the importance of each item shortly.
Choosing a Durable Anchor Rope
Often referred to as the kayak anchor line, the anchor rope serves as a critical link between your kayak and the anchor. It needs to be strong, durable, and resistant to water. A weak or frayed rope can snap under pressure, releasing your anchor and leaving you adrift.
A rope with a diameter of 5mm (or 3/16in) is ideal for kayak anchoring. It offers sufficient strength while being light enough to handle easily. Among the various types of ropes, the polyester clothesline stands out as the best option. Why? Because it has water-resistant properties and offers reduced water resistance when hauled. So, when you’re packing your anchoring kit, make sure to include a sturdy anchor rope.
Importance of a Reliable Kayak Anchor Trolley
The next item in our kit is the kayak anchor trolley. This isn’t your regular supermarket trolley. It’s a crucial piece of gear that:
- Allows for adjustments to the anchor line from either the bow or stern
- Ensures optimal positioning against the current
- Enhances your overall control over the kayak.
The kayak anchor trolley consists of:
- A loop of cord that runs between two pulleys at the ends of the kayak
- This allows for easy maneuvering and positioning of the anchor
- The anchor line is attached to this cord through a carabiner
- By pulling the trolley line, you can slide the carabiner and anchor rope along the side of the kayak to either the bow or stern
- This ability to adjust the kayak’s position from bow to stern provides practical benefits, especially for kayak fishermen and frequent anchor users.
The essential components of an anchor trolley typically include:
- Pad eyes
- Pulleys
- A length of cord
- A karabiner or ring
Some kits also include a cleat for locking the anchor line position. While there are various trolley systems available in the market, the Yak-Gear Deluxe Anchor Trolley Kit and the YakAttack Kayak LeverLock Deluxe Anchor Trolley come highly recommended for their efficient and effective adjustment capabilities.
Safety First: Essential Gear for Anchoring
The adage, “Safety first,” is a familiar one. And when it comes to kayak anchoring, it couldn’t be more true. To kayak safely, safety gear is an absolute must in your anchoring kit. This includes a safety knife, waterproof strobe lights, and a basic rescue kit.
A safety knife is critical for quickly cutting the anchor rope to prevent capsizing or being dragged by a strong current. This knife should be easily accessible, preferably clipped to your Personal Flotation Device (PFD). Remember, in a dangerous situation, every second counts. A quick-release anchor setup, such as the weak-link method with a cable tie, can also help to avoid entanglement and facilitate a quick release if snagging occurs.
Lighting is another crucial aspect of safety. Waterproof strobe lights on your PFD can enhance your visibility to rescuers, especially in dim lighting. Furthermore, keeping a waterproof bag onboard with a basic rescue kit containing medical supplies is a vital safety precaution. So, when you’re packing your anchoring kit, don’t forget to prioritize safety.
Step-by-Step Guide: How to Anchor a Kayak in a River
Alright, everyone, it’s gone time! We’ve covered how to pick out the best anchor and put together an unbeatable anchoring setup. It’s about time we turn our insights into action. Let me walk you through a detailed process for setting your kayak in place on a river.
The procedure can be broken down into three key phases: picking out the perfect location, making sure the anchor is securely fastened, and using your anchor trolley system to fine-tune your positioning. Like mastering any technique, starting off by practicing in calm waters will help build up confidence before attempting this skill under more complex conditions.
Never forget that safety comes first. Be ready at all times to sever the anchor line if you find yourself with an immovably caught anchor. Make allowances for variables such as wind strength, tide movements, and water currents when releasing the anchor from your kayak. Each phase of this method will be carefully unpacked so you gain thorough insight.
Finding the Perfect Spot
Initiating the process of anchoring your kayak involves identifying an optimal spot. The ideal location is not merely about a scenic outlook, though that certainly adds to the experience. It’s essential to comprehend the contours of the riverbed to secure a firm and secure point for anchor placement.
In this endeavor, utilizing a sounder or fish finder can prove exceptionally valuable. This tool aids in pinpointing prime positions for anchoring while offering detailed information regarding the characteristics of the river floor. Before setting your anchor down, make sure you survey the intended area thoroughly with your sounder.
Setting the Anchor Securely
Having identified your ideal location, it’s time to anchor. Begin by placing the coiled anchor rope on the deck. As you let the anchor plunge into the water, quickly secure the line to your kayak using the carabiner on your anchor trolley.
Once you’re certain that the anchor has settled at the bottom of the riverbed:
- Let out more rope than twice as much as the water’s depth, creating a firm hold against any movement from currents.
- Should there be drifting motion in your kayak, simply play out additional lines until stability is achieved.
- Lock down this extra length of rope with either a cleat or use a jam cleat for simpler disengagement if needed.
There we have it — your anchorage is successfully established!
Adjusting Position with the Anchor Trolley
In the last step of anchoring, you fine-tune your kayak’s placement with the help of the anchor trolley system. The adaptability of this setup is most evident in how it allows for precise control.
By manipulating the trolley line, you can effortlessly glide the carabiner and attach an anchor rope to position at either end of your kayak—the bow or stern—thereby aligning yourself according to wind or water currents. Mastery comes with practice. If initial attempts don’t go as planned, keep at it. As you gain experience, positioning your craft expertly will become second nature.
Adapting to River Conditions
River conditions can fluctuate unpredictably. One moment, the water is calm and serene, and the next, a strong current is pulling your kayak. As a kayak angler, you need to be prepared to adapt to these changing conditions.
In strong currents or high-risk areas, you may need to release additional anchor lines or even deploy a second anchor. The ‘rule of three’ can be your guiding principle here. For every foot of water depth, three feet of rope should be let out. This decreases the anchor line angle and increases holding power.
It’s also crucial to choose an anchor that aligns with the river’s characteristics and your boat’s design. For instance, in shallow water, a stake-out pole can be more effective than traditional anchors. Let’s discuss these situations in more detail.
When the Current is Strong
Powerful currents can make it difficult to anchor a kayak securely. Yet, with the right methods, you can still anchor effectively in these environments.
Initially, let out more lines once your anchor settles on the river bottom. By doing so, you ensure an adequate angle and stronger hold. Should your kayak continue to drift after this step, consider setting up a second anchor off the stern end of your kayak. This additional anchoring point will help keep movement at bay and diminish the chances that your vessel will rotate or swing around.
Anchoring in Shallow Water
Navigating the unique demands of shallow waters, a power pole micro anchor emerges as an invaluable companion for stable anchoring.
In soft-bottomed areas, utilizing a stake-out pole to affix your kayak can be remarkably effective. Whether you thread it through the scupper hole or embed it directly into adjacent mud or sand and fasten it with a rope, this approach enhances both stability and enjoyment during close-to-shore kayaking and fishing activities.
Enhancing Your Fishing Experience While Anchored
Anchoring serves not only to stabilize your fishing kayak but also to improve your fishing experience. After all, a stationary kayak allows you to focus on your fishing without worrying about drifting away.
Minimizing movement and noise is critical to avoid scaring away the fish. Be patient and persistent in re-anchoring to achieve the precise positioning that facilitates effective bait placement. Anchoring accurately near bottom contours such as ridges, which are likely fish-gathering spots, improves your fishing success.
To attract more fish to your anchored position, consider using chum or dispersed baitfish to establish a scent trail. Casting bait up current and letting it drift down naturally to the fish is another effective method.
Navigating Anchoring Regulations and Best Practices
Finally, we should address the legal and ethical considerations of kayak anchoring. Yes, even something as simple as dropping an anchor has its own rules and regulations. These are designed to ensure everyone’s safety and protect the aquatic environment.
Adhering to kayak registration laws, respecting restricted areas, and engaging in environmentally friendly anchoring practices are all part of being a responsible kayak angler. Also, remember to always operate your vessel safely, avoid reckless behavior that endangers life, limb, or property, and adhere to kayak fishing regulations.
Lastly, don’t forget to assist others in distress. Good Samaritan laws may compel kayakers to assist others in distress. So, be aware of your state laws to prevent liabilities. And remember, safety always comes first.
What can I use as a kayak anchor?
What are the options for a kayak anchor? The answer depends on your specific needs and the river conditions. Common items used as kayak anchors include folding grapnel anchors, Bruce anchors, and drag chains.
Each of these anchors has its unique qualities.
- Folding grapnel anchors are ideal for rocky riverbeds, thanks to their four folding flukes.
- The Bruce anchor is specifically engineered for anchoring in soft sediments such as sand, mud, and gravel. It is an effective choice for boaters looking for reliable holding in these types of conditions.
- Drag chains provide a gentle hold, making them suitable for slow-moving rivers or areas with muddy bottoms.
How heavy of an anchor do I need for a kayak?
The effectiveness of a kayak anchor can be influenced by its weight. However, the weight you need depends on the type of anchor and the specific conditions. For typical fishing on the flats, a 1.5 lb folding anchor works well for a kayak. In significant current, a 3.0 lb anchor with plenty of rodes (anchor line) is recommended.
Remember, the effectiveness of a folding anchor is not solely based on weight. The proper amount of rode to allow the anchor to lie on its side and dig into the bottom also plays a crucial role. A chain can be added directly at the anchor to help keep the flukes stuck in the bottom, enhancing the anchor’s grip.
Where is the best place to anchor a kayak?
The optimal location to anchor a kayak is contingent on a variety of factors. These include the water depth, bottom contours, and river conditions. Anchoring from the bow or stern of the kayak is recommended, rather than from the side, to reduce the risk of flipping over in strong winds or currents.
A fish finder can be your best friend in this process. It helps you understand the riverbed’s nature and identify potential anchoring spots. For instance, hard seabeds, indicated by a strong reflection of acoustic energy back to the transducer, might indicate a good anchoring spot.
In shallow water, an anchor pole can be inserted through a scupper hole or pushed into the sand or mud near the kayak. In breezy conditions, a drift anchor or drift sock can be used to slow down the kayak’s speed and allow for fishing in a broader area without drifting away too quickly.
Frequently Asked Questions
How to anchor a kayak?
To secure a kayak, release the anchor into the water and connect the rope to it using a carabiner. Then by drawing on the trolley line, reposition the attached anchor rope toward either your kayak’s bow or stern.
Hold off until you feel that the anchor has gripped firmly and notice as your kayak aligns itself with both wind and current direction.
Where is the best place to anchor a kayak?
Utilizing a kayak anchor trolley is the optimal method for anchoring a kayak from either its bow or stern, particularly when engaged in fishing activities or on tranquil lake waters. This system simplifies the correct placement of your anchor.
How heavy of an anchor do I need for a kayak?
For tranquil, windless waters, a 1.5 lb grapnel anchor should suffice to maintain your kayak’s stability, while in harsher conditions or when using bigger kayaks, you may need to use a 3.5 lb anchor for added security without making it overly burdensome to manage.
What should be included in a river anchoring kit?
Ensure that your kayak anchoring set comprises a durable anchor rope and a reliable kayak anchor trolley, To essential safety equipment such as a safety knife and waterproof strobe lights.
It is important to be prepared with an essential rescue kit for emergencies.
How do I adjust my kayak’s position using the anchor trolley system?
Utilize the anchor trolley system on your kayak to reposition it by pulling the trolley line, and moving the carabiner and anchor rope along your kayak’s side towards either the bow or stern. This adjustment aids in orienting your kayak to better face wind or current conditions.
Conclusion
The path to mastering kayak anchoring in a river is indeed a journey. It involves selecting the right anchor, crafting a suitable anchoring kit, and adapting to various river conditions. It’s a skill that requires practice, patience, and a deep understanding of the river’s rhythm.
Once you’ve mastered it, you’ll find it’s worth every bit of effort. Whether you’re out for a relaxing day of fishing or pitting your skills against the river’s challenges, knowing how to anchor your kayak securely and effectively enhances your experience tenfold. So go ahead, grab your gear, and start on this exciting adventure!