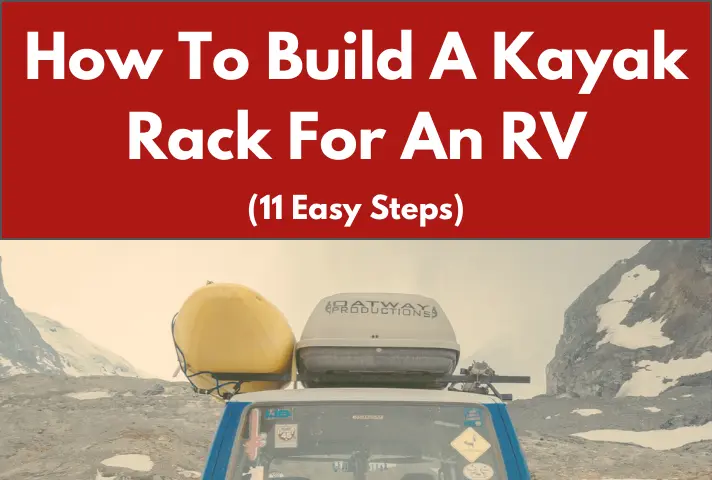
Start your RV adventure with a custom-built kayak rack! In this step-by-step guide, you’ll craft a secure and efficient rack that transforms how to build a kayak rack for an RV. As an avid RVer, we understand the frustration of limited storage. That’s why I’ve compiled this comprehensive article– sharing the secret to hassle-free kayak transport and ensuring your next journey as it is exhilarating.
- Types Of RV Kayak Rack
- Things You Need To Build A Kayak For An RV
- Step By Step Process On How To Build A Kayak Rack For An RV
- How to Build a Kayak Rack for a Trailer
- Can You Fit a Kayak in an RV?
- How to Make a Kayak Rack for an RV
- How To Build A Kayak Rack For An RV Out?
- Vertiyak Kayak Rack For RVs And Campers
- How Much Does A Kayak Rack For RV Cost?
- Frequently Asked Questions
- What do you need for a kayak roof rack?
- Can I put kayak directly on roof rack?
- How do you transport a kayak on an RV?
- Conclusion
Types Of RV Kayak Rack
There are various types of kayak racks designed specifically for RVs, catering to different preferences and needs. Here are some common types:
Roof-mounted kayak Racks:
- Installed on the roof of the RV.
- Utilizes crossbars or specialized kayak carriers.
- Ideal for smaller RVs or when towing a trailer.
Rear-Mounted Kayak Racks:
- Attaches to the rear of the RV.
- Can be a hitch-mounted rack or a custom-built frame.
- Provides easy access to kayaks without climbing on the roof.
Ladder-Mounted Kayak Racks:
- Attaches to the RV’s ladder.
- Compact and convenient for smaller kayaks.
- Suitable for RVs with ladders on the rear.
DIY PVC Pipe Racks:
- Custom-built using PVC pipes and fittings.
- Affordable and customizable to fit specific kayak dimensions.
- Can be used with roof or rear mounting.
RV Kayak Trailers:
- Specialty trailers designed to carry kayaks.
- Towed by the RV, providing additional storage capacity.
- Suitable for those with multiple kayaks or larger RVs.
Interior Kayak Storage Systems:
- Built-in storage solutions inside toy hauler RVs.
- Protects kayaks from the elements during travel.
- Requires adequate interior space and planning.
Folding Kayak Racks:
- Designed to fold when not in use.
- Offers convenience and reduces wind resistance.
- Suitable for RVers who prefer a streamlined appearance.
Adjustable Kayak Racks:
- Allows for easy adjustment with multiple kayak sizes.
- Provides versatility for carrying various types of kayaks.
- Ideal for RVers with a fleet of kayaks of different dimensions.
When choosing an RV kayak rack, consider factors such as kayak size, RV type, ease of installation, and personal preferences. Each type offers unique pros according to RV enthusiasts who enjoy kayaking on their adventures.
Things You Need To Build A Kayak For An RV
Building a kayak rack for an RV involves specific materials and tools to ensure a secure and functional structure. Here’s a list of things you’ll need:
Materials:
- PVC Pipes or Metal Tubing: Depending on your preference and budget.
- Connectors and Joints: PVC elbows, T-connectors, or metal tubing connectors.
- Base Material: Plywood or another sturdy material for the base of the rack.
- Straps or Tie-Downs: To keep kayaks in contact with the rack.
- Screws and Bolts: For assembling the frame and attaching it to the RV.
- Paint or Sealant: To protect the rack from the elements.
- Padding or Foam: To protect the kayaks from scratches and damage.
- Optional: Weather-resistant outdoor fabric or netting for additional security.
Tools:
- Saw: For cutting PVC pipes or metal tubing.
- Drill: To create holes for screws and bolts.
- Screwdriver or Wrench: For tightening screws and bolts.
- Measuring Tape: To get accurate dimensions of the design.
- Sandpaper: To smooth rough edges of cut materials.
- Level: Keep the rack leveled when attached to the RV.
- Paintbrush or Spray Gun: If you choose to paint the rack for protection and aesthetics.
Safety Gear:
- Safety Glasses and Gloves for handling every hardware material.
Design Plan:
- A sketch or plan outlining the dimensions and structure of your kayak rack.
RV Information:
- Knowledge of your RV’s roof or rear structure to ensure proper attachment points.
Assistant:
- Having someone to help you with holding components in place or providing an extra set of hands can be beneficial during the assembly process.
Ladder:
- If you’re installing the rack on the roof of the RV, a ladder will be necessary for access.
Remember to consider the weight capacity of your RV’s roof or rear structure, and distribute the weight of the kayaks evenly on the rack to ensure stability during travel. Always follow safety guidelines and instructions when working with tools and materials.
Step By Step Process On How To Build A Kayak Rack For An RV
Build a sturdy kayak rack for your RV in a few simple steps. Gather PVC pipes, connectors, plywood, and straps. Cut and assemble the frame, attach a plywood base, add padding for kayak protection, and secure with adjustable straps. Paint or seal the rack for durability. Install on the RV roof, ensuring stability for safe travels.
Gather Materials and Tools
Collect all the materials and tools needed for the project, including PVC pipes or metal tubing, connectors, plywood, straps, screws, bolts, paint or sealant, padding, and safety gear.
Measure and Plan
Determine the appropriate size for the rack. Sketch a plan that includes the dimensions and the design of the rack, considering the number of kayaks you want to carry.
Cut PVC Pipes or Metal Tubing
Using a saw, cut the PVC pipes or metal tubing according to the measurements in your plan. Ensure precision and accuracy in cutting to create the main frame of the kayak rack.
Assemble the Frame
Connect the cut pieces using PVC connectors or tubing connectors to create the basic frame of the kayak rack. If using PVC, consider dry-fitting the pieces first to ensure a snug fit.
Create the Base
Cut the plywood for the base of the rack. Attach and secure using screws, providing a stable platform for the kayaks.
Attach Padding or Foam
Apply padding or foam on the rack’s contact points to protect the kayaks from scratches and damage during transportation. Secure the padding with adhesive or straps.
Paint or Seal the Rack
If desired, paint the rack with outdoor paint or apply a sealant to protect it from the elements. Allow sufficient time for drying before proceeding.
Install Straps or Tie-Downs
Attach straps or tie-downs to the rack to secure the kayaks. Make sure they are adjustable and can be tightened to keep the kayaks in place during travel.
Test the Rack
Before attaching it to the RV, make the required adjustments after checking the stable results of the process. The rack should support the weight of the kayaks without wobbling.
Attach the Rack to the RV
If installing on the roof, use a ladder to access the RV’s roof. Attach the rack securely to the roof or rear structure using screws and bolts.
Final Check
Double-check all connections and ensure that the rack is securely attached to the RV. Test the straps or tie-downs to confirm that they are holding the kayaks in place.
Now, your DIY kayak rack for the RV is ready. Always follow safety guidelines and instructions during the construction process.
How to Build a Kayak Rack for a Trailer
- Gathering Materials: Start by collecting materials like metal tubes made of steel or aluminum, fastening bolts, nuts, and mounting brackets. For a cost-effective alternative, opt for pressure-treated lumber.
- Planning and Measuring: Sketch out a design for the rack that fits the trailer’s size and accommodates the quantity of kayaks you wish to carry. Mark the trailer for where the support bars and braces will be placed.
- Constructing the Frame: Cut your chosen materials—tubing or wood—into the necessary lengths and put together the frame structure. Install the support bars at intervals that align with the width of your kayaks.
- Applying Protective Padding: Fix foam or rubber padding onto the support bars to prevent your kayaks from getting scratched or damaged.
- Mounting the Rack: Firmly attach the rack to the trailer using bolts, ensuring it is secure and capable of supporting the kayaks’ weight. Check the stability of the rack by practicing loading and unloading the kayaks.
Can You Fit a Kayak in an RV?
The feasibility of stowing a kayak inside an RV hinges on the kayak’s dimensions and the available space within the RV. Compact kayaks, such as inflatable or collapsible models, are more suited for RV storage since they can be deflated or folded down to fit into tighter areas. For hard-shell kayaks, it’s important to compare the length of the kayak with the internal storage space of the RV to see if it’s a match. If the interior doesn’t suffice, you might want to look into external solutions such as roof or trailer racks for transport.
How to Make a Kayak Rack for an RV
- Choosing the Location: Select the most suitable spot on the RV—be it the roof, the rear, or the sides—keeping in mind the need to accommodate the kayaks’ weight and dimensions.
- Material Collection: Procure necessary items like metal or PVC tubing, fastening brackets, securing straps, and protective padding. Additionally, ready your toolkit with essentials such as a drill, saw, and tape measure.
- Assembling the Structure: Trim the tubing to the desired measurements and piece together the framework based on your chosen location. Design it for ease of access for placing and removing kayaks.
- Applying Protective Measures: Apply foam cushions or rubber padding at points where the rack will contact the kayaks to avert any wear and tear.
- Installing the Rack: Firmly affix the rack onto the RV with the help of brackets and bolts, ensuring it remains stable and is able to endure the rigors of travel.
- Conducting a Trial Run: Place the kayak on the rack and employ straps or tie-downs to secure it firmly. Verify the stability of both the rack and the kayak prior to setting off on your travels.
How To Build A Kayak Rack For An RV Out?
Crafting a kayak rack for your RV is a straightforward project with these simple steps. First, gather PVC pipes, connectors, and plywood for the frame and base. Cut and assemble the frame, ensuring a snug fit. Attach a plywood base, securing it with screws. Add padding to protect your kayaks. Paint or seal for durability. Install adjustable straps to secure your kayaks. Whether on the roof or rear, attach the rack securely using screws and bolts. Test for stability and enjoy your customized RV kayak rack!
Vertiyak Kayak Rack For RVs And Campers
This innovative rack offers a space-efficient vertical design, allowing you to securely transport your kayak without sacrificing valuable storage. Crafted for convenience, Vertiyak simplifies loading and unloading, maximizing your outdoor adventures. With its strong construction and installation, this rack ensures a hassle-free and enjoyable travel experience. Enjoy your RV or camper capabilities with the Vertiyak Kayak Rack, and bring a new level of efficiency on your journey.
How Much Does A Kayak Rack For RV Cost?
The cost of a kayak rack for an RV depends on design, materials, and brand. Basic DIY PVC pipe racks may cost around $50 to $100 in materials. Commercially available roof-mounted racks range from $100 to $500, while hitch-mounted or ladder-mounted options can be in the $200 to $600 range. Customized or premium racks with additional features may exceed $700. Choose based on the needs and budget to find the ideal kayak rack for your RV.
Frequently Asked Questions
What do you need for a kayak roof rack?
To set up a kayak roof rack, you’ll require essential components such as crossbars mounted on the roof of your vehicle, kayak rack mounts that attach to these crossbars, and foam or pads to provide cushioning between the kayak and the roof. Bow and stern tie-down straps are crucial for securing the kayak’s front and back to the vehicle, while ratchet straps enhance overall stability during transport. Assembling these components ensures a secure and reliable kayak roof rack system for hassle-free travel.
Can I put kayak directly on roof rack?
While it’s possible to place a kayak directly on a roof rack, using additional padding or foam is highly recommended. This prevents potential scratches or damage to both the kayak and the roof rack. Securing the kayak with tie-down straps is essential for stability and ensuring a safe transport experience on your vehicle’s roof.
How do you transport a kayak on an RV?
To transport a kayak on an RV, use a specialized kayak rack. Options include roof-mounted racks, rear-mounted racks, ladder-mounted racks, or trailers. Install the chosen rack securely, ensuring stability. Utilize tie-down straps to secure the kayak in place. Consider factors like weight distribution and aerodynamics for a safe and efficient transport experience.
Conclusion
When you know how to build a kayak rack for an RV, then it’s a fulfilling endeavor that enhances your travel experience. We hope that the article has been able to solve all your queries. As an enthusiast myself, the significance of a customized solution for kayak transport is invaluable. Did you find this guide helpful? Enjoy the article, and consider sharing it with fellow RV enthusiasts.